
Ah routing! Today, I’ll attempt to explain how to do routing in Angular with simple English. You don’t need to read the whole blog post. Just pick and choose from the topics below. After getting things working, you can come back and read the rest if you want.
Please note that I didn’t include the import statement of all of the components. Please add them accordingly.
Topics:
- Simple Routes – Flat routes for a few pages at the same level
- Create a Routing Module – Put all the routes into a single route file
- Nested Routes – Manage child routes
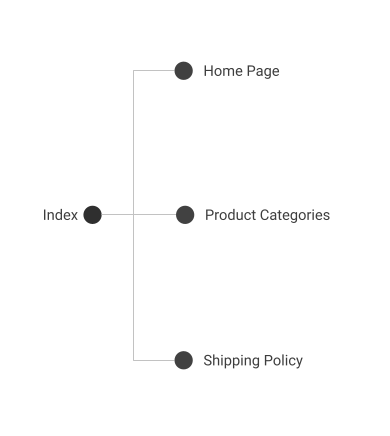
1. Simple Routes
Imagine we want to create an application with only 3 pages: Home, Product Category, and Shipping Policy.
In the app.module.ts:
That’s simple. From lines 1-10, we defined all the routes in a constant object called appRoutes. As you see, the /home route is mapped to the HomeComponent, the /product-categories route is mapped to the ProductCategoriesComponent, etc. Then, we configured the RouterModule with a static method called forRoot with the appRoutes object.
2. Create a Routing Module
This step extracts the code related to routing from the AppModule to AppRoutingModule, a separate file. The whole reason for doing this is to decouple the code. It’s easier to manage route-related code and application module separately.
Create a new file for routing. You can call it whatever you like. I’m going to name it app-routing.module.ts
Don’t forget the put RouterModule in the exports array(line 21). This will re-export the RouterModule that we just configured on line 20. Any module that imports this AppRoutingModule gets access to the RouterModule.
Now we can simplify the AppModule(app.module.ts) as the following:
Much cleaner than the one in the example of Simple Routes, right?
3. Nested Routes
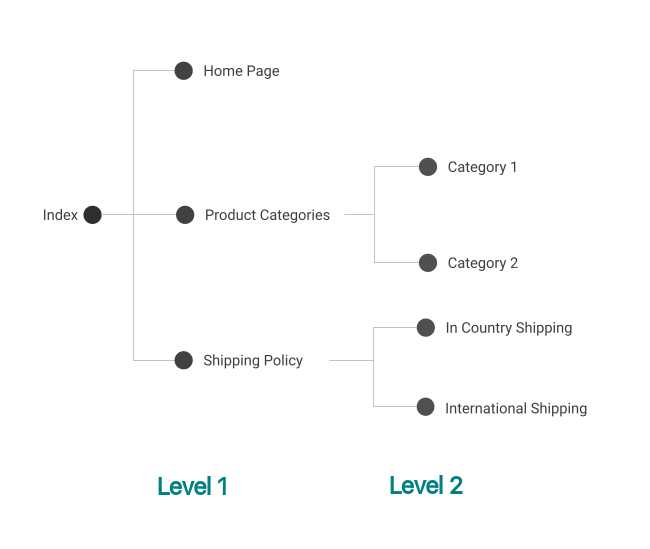
What if now you don’t want to keep all the Product Categories on the same page? You want to add some sub-pages to the /product-categories route for different categories. Of course, you have to create new components. i.e. CategoryOneComponent and CategoryTwoComponent.
Then add them to the AppRoutingModule as the following code on lines 5 to 8. The children array indicates all the sub-route for the /product-categories route. The path of the empty string(line 6) is to set the default sub-path when the sub-path is not indicated.
For example, if the user enters
https://myexample.com/product-categories
Thanks to line 6, s/he will be redirected to
https://myexample.com/product-categories/category-one
Now, the ProductCategoriesComponent has to act as a placeholder for CategoryOneComponent or CategoryTwoComponent. In product-categories.component.html, we need to add the router-outlet tag. So the content can be substituted by one of the two children.
That’s how you do nested routes in Angular. I know it’s a little confusing. Leave me a message if you have a question.
Check out my other post about constructing an Angular Post Request.
If my note helped, please consider buying me a coffee😁.
Cheers,
Lok
Leave a Reply